Introduction 🌟#
In this article I will explain how I did to complete the steps 4,5 and 6 of the Cloud Resume Challenge Azure. Which are the parts where you deploy your website and attach a custom DNS to it !
Deploy a static website with a storage account 🔧#
Begin by creating a resource group, which will serve as a container for your storage account and other related resources. You can name this resource group anything you prefer, making it easy to manage and organize your resources. Mine is CRC_RG for instance.
Basics Configuration#
- Name: Assign a unique
nameto your storage account. For this example, let’s use stracccrc. - Region: Select the region
closestto your users or your data center to minimize latency. - Primary Service: Choose Blob Storage as the primary service since it is optimized for storing large amounts of
unstructured data. - Redundancy: Opt for LRS (Locally Redundant Storage). As this is an experimental environment and not a production one. We don’t have any
criticaldata to protect.
Advanced Settings#
- Anonymous Access: Enable anonymous access on individual containers if you need to `allow public access to specific blobs without authentication.
- Access Tier: Select Cool for the access tier. This tier is ideal for data that is infrequently accessed but still needs to be readily available.
Networking#
- Virtual Network: Create a virtual network to enhance security and control network traffic to your storage account if needed.
- Public Network Access: Configure public network access settings based on your security requirements.
Data Protection#
In this section, you can leave the default settings as they are, unless you have specific data protection needs.
Encryption#
Azure Storage accounts come with built-in encryption for data at rest. You can leave the default encryption settings unless you have specific compliance or security requirements.
Tags#
Tags are optional but highly recommended for organizing and managing your resources. You can add custom tags such as Maintainer and Project to help identify and categorize your storage account easily.
By following these steps, you’ll have a well-configured Azure Storage Account tailored to your needs. This setup ensures that your data is secure, easily accessible, and well-organized within your Azure environment !
Allow website hosting#
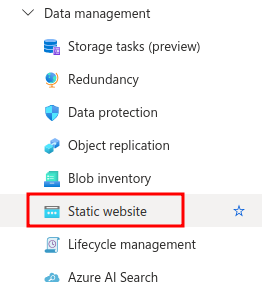
Once you have successfully created your storage account, go into your resource and in the Data Management section on the right-hand menu, select Static Website
From there, you need to enable the static website option and fill in the require fields.
- Index document name : the name of your resume for instance.
- Error document path : if you’ve created one, you can specify the error path to display when your site is
unavailable.
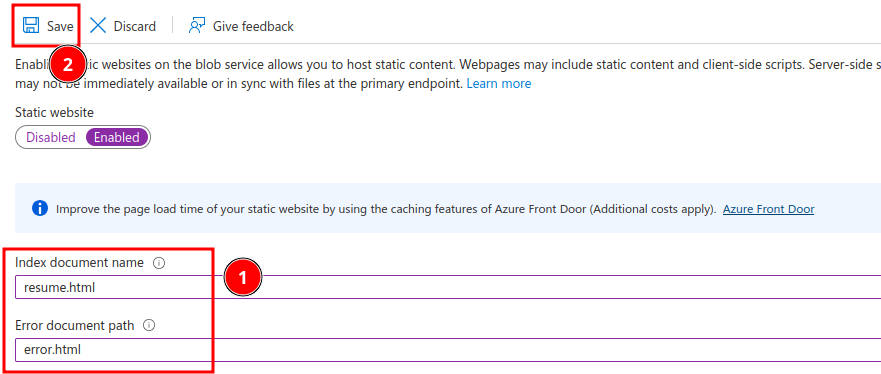
Once you’ve saved the configuration, make sure to copy the Primary endpoint, it should look something like:
https://<name>.web.core.windows.net/
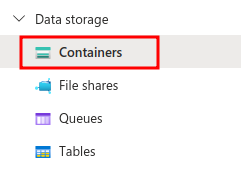
After that, all you need to do is push your resume to the $web container :
- Go into the Containers section under Data Storage:
- Click Upload and select your files.
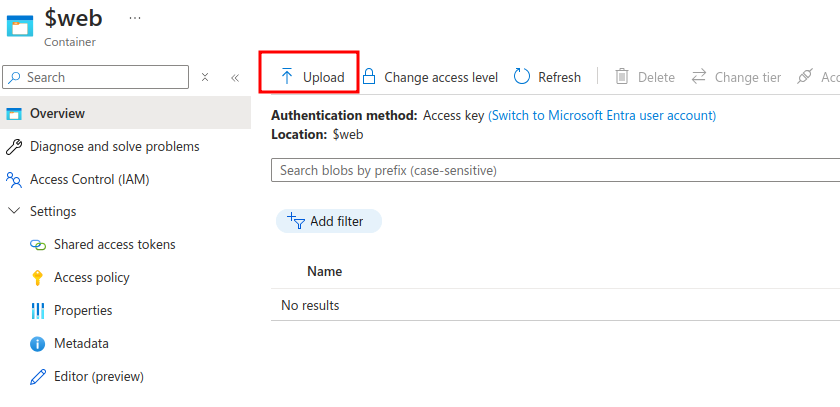
Azure will automatically detect your files and serve it through your static website !
Don’t forget to upload your HTML file along with your CSS — otherwise, your website won’t have any styling! 😄
To test your web hosting, try accessing the URL you saved earlier. If it works congratulations!. You’ve completed the 4th stage of the Cloud Resume Challenge Azure !
Front Door and your website 🖥️#
In this part, we’ll set up Azure Content Delivery Network (CDN) to enhance both the security and performance of our static website.
What is a CDN ?#
A Content Delivery Network (CDN) is a system of distributed servers that deliver content (like images, videos, HTML, CSS, and JavaScript) to users based on their geographic location. By using a CDN, your website’s content is cached and served from servers that are closer to the user, improving load times and performance.
There are multiple ways to create a CDN in Azure, but we’ll choose Azure Front Door instead of Azure CDN because the latter will be deprecated.
At our level, there’s no major difference between the two services. However, if you plan to host your resume for a long time (who knows, right? 😄), it’s better to choose the service that won’t be deprecated.
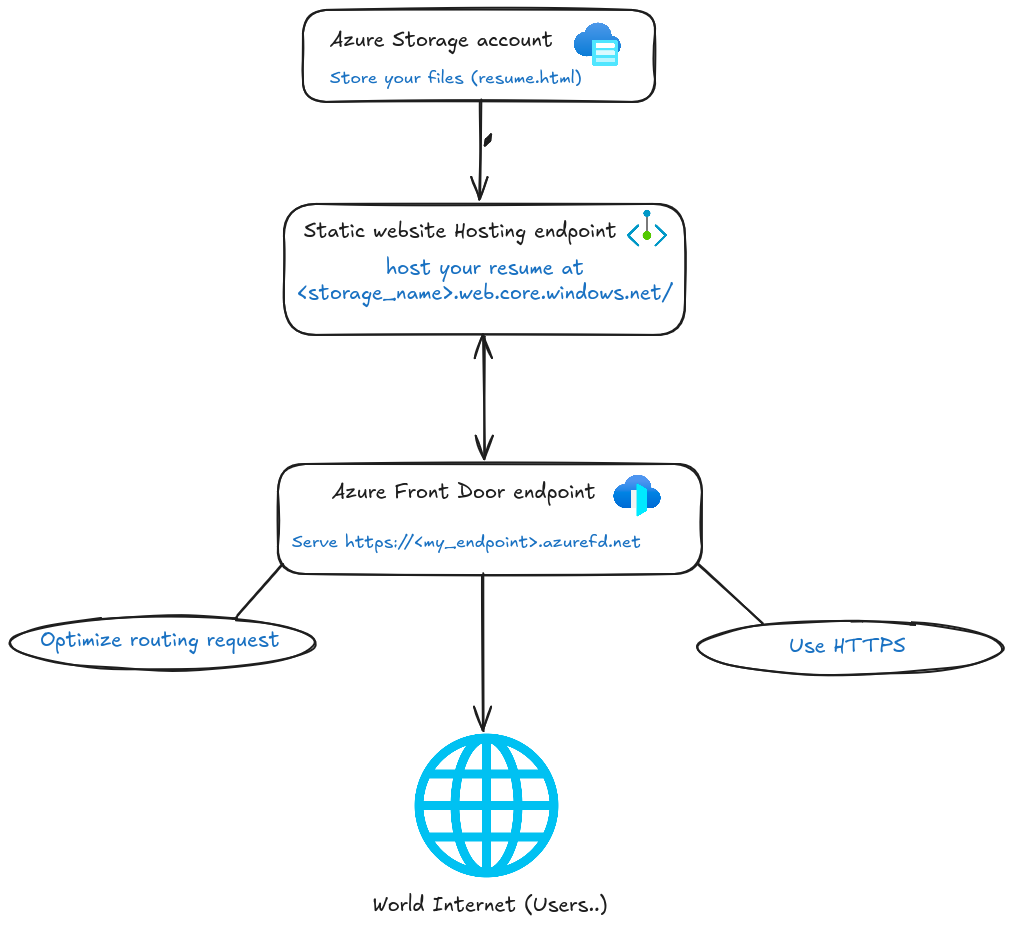
What is an endpoint ?#
I think it’s useful to explain briefly what is an endpoint for Azure Front Door since this is something we’ll be working with to host our website. To make things easier to understand, I made a simple diagram :
Create the Front Door#
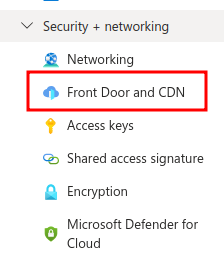
To create the front door, navigate through the Security + Networking section on the right-hand menu. Then, select Front-Door and CDN.
Next, you need to fill the form about a New endpoint just as below :
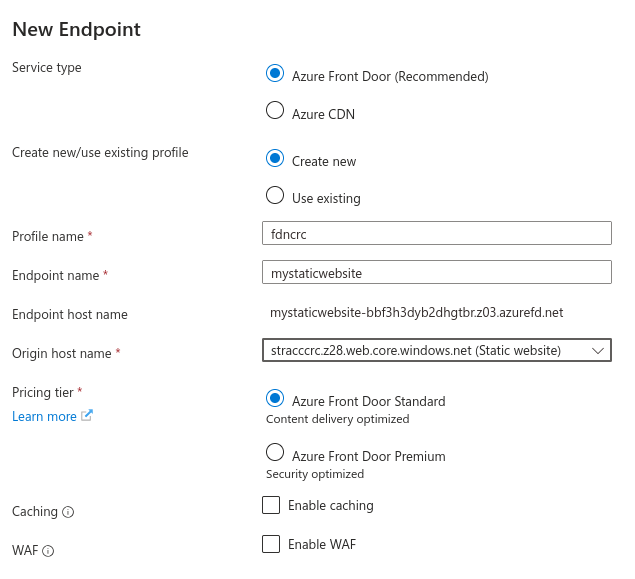
Service: Select, Azure Front Door as I said before, Azure CDN will be deprecated in 2027.Profile name: Enter a name of your Azure Front Door, like frontdoorcloudresume or fdncrc, whatever you prefer. It will be appear in your resource group so pick a name you’ll recognize right away ! 😄Endpoint name: The name of your endpoint, it will be the beginning of your endpoint URL. You should use something like myawesomeresume or resumecrc.Origin hostname: Make sure to select the correct endpoint, you need to use the static website endpoint to properly display your site 😎Pricing tier: I suggest you to use the Standard option because the Premium tier is very expensive and useless for our use case 😄Caching: I chose to leave it off, but it’s a great option to explore, feel free to test it if you’re curious !WAF: For this basic setup, you can leave it disabled, but feel free to enable it if you wan’t an extra protection !
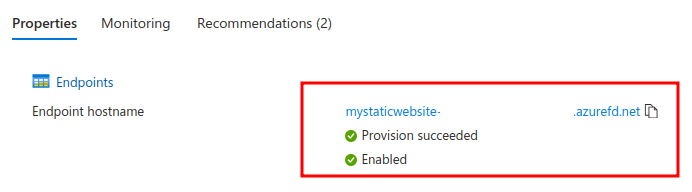
Once you’ve created your Front Door, you’ll need to check if your endpoint is configured correctly. Make sure it’s provisioned by checking the Settings section inside the Front Door Manager. Just like below :

When you see the green checkmark, you’re good to go! Now you can check the URL provided in the Overview tab and test your website.
Let’s go! We did it, we’ve completed the 5th part of the Cloud Resume Challenge, and we used a CDN to securely deliver our resume. Congratulations! 🎉😊
Now we need to map a custon domain to our website !
Map a custom domain 🌐#
In order to map a custom domain to your website, make sure to purchase a domain name ! I already talked about how to purchase a domain name :
This is a unique, easy-to-remember address used to access websites, such as google.com and facebook.com. Users can connect to websites using domain names thanks to the DNS system. You can purchase domain names from providers like GoDaddy, Namecheap, or personnaly I bought it on Infomaniak.
It’s from my article : “How to deploy Blowfish using Github Pages and Infomaniak 🌍 “, you can check it out 😄
Navigate to the Domains subsection and review the content :
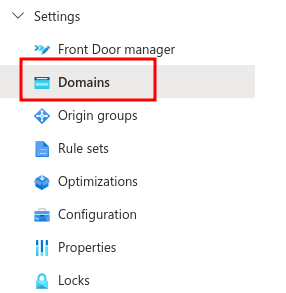
Click on Add to register your custom domain with Azure !
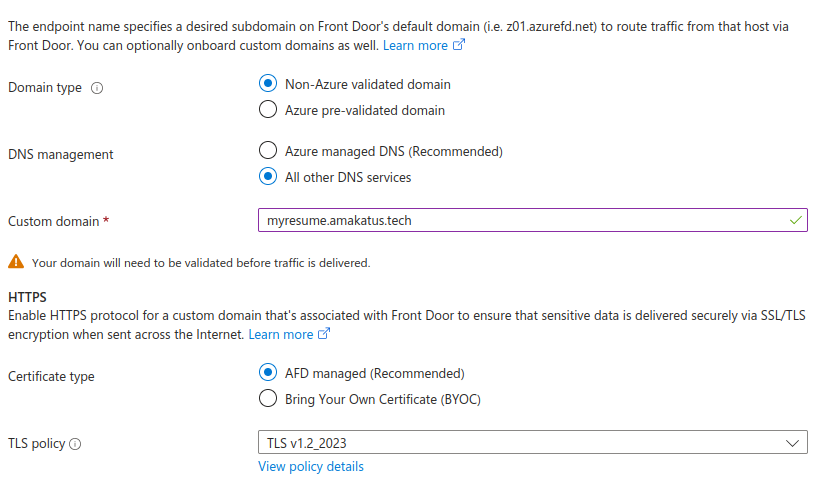
Domain type: If you already have a domain that has been pre-validated by Azure, you can simply check this option. But in my case, the domain hasn’t been validated yet so I’ll walk you through the validation process step by step.DNS Management: Domains bought through Azure are automatically managed by Azure DNS, so you can leave the default option (Azure-managed DNS) selected. However, my domain is hosted externally with Infomaniak, so I’ll choose All Other DNS Services instead.Custom Domain: Here, simply enter your domain name along with its extension. For example, my domain is amakatus.tech, so I’ll use resume.amakatus.tech as the full domain name.Certificate type: I don’t manage my SSL/TLS certificate directly. Instead, I prefer to use the Azure Front Door Managed option.TLS Policy: Azure Front Door also allows you to define your TLS policy, which ensures secure communication between your users and Azure services. For most use cases, the default policy works, but you can customize it based on your security requirements.
Next, we need to configure our DNS. For now, we can leave Azure aside and focus on this step. 😊
Validation of your custom domain for Azure#
If you haven’t validated your domain yet, you’ll need to go through Azure’s domain verification process. If you’ve already validated your domain or purchased it directly through Azure, you can skip ahead to the next section.
By default, Azure does not trust external domains. To verify that you actually own the domain, you need to add a special DNS record. This record acts as proof of ownership, allowing Azure to establish a trusted connection with your domain.
You should have received a TXT record like the one below, which you’ll need to add to your DNS provider’s configuration:
| Source | Type | Value |
|---|---|---|
| _dnsauth.eozadazd.por.tech | TXT | _t75cvpp8j9olk9kxsyrtxeleav7w9w8 |
To get these exact details, go to the “Pending” status link next to your custom domain in the Azure portal. This section provides the source (the subdomain Azure expects) and the unique TXT value you’ll need to use for validation.

Create the redirection to the endpoint#
Once you’ve added the DNS record through your domain provider’s dashboard, Azure will periodically check for its presence. This step is required to prove you control the domain.
After validation is complete, you’ll also need to create a CNAME record pointing your domain to the Azure endpoint. The endpoint address can be found on the main page of your Azure resource usually something like yourapp.region.cloudapp.azure.com.
| Source | Type | Value |
|---|---|---|
| your_domain_name | CNAME | _t75cvpp8j9olk9kxsyrtxeleav7w9w8 |

Now that this is done, you should see your resume live on your custom domain! 🎉 And with that, we’ve officially completed the 6th part of the Cloud Resume Challenge! 😎🔥
What’s Next? 🚀#
In my next article, we will tackle parts 7 and 8 of the Cloud Resume Challenge! We’ll be building a counter in JavaScript and storing the data in a database.